- UIView 클래스에 있는 Animation 기능을 사용하여 간단한 예제이다.
- Button을 누르면 Label이 Animation 기능으로 움직이게 된다.
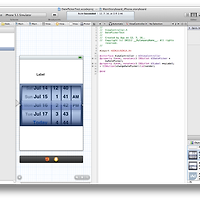
- 화면 디자인

- Animation 만들기 순서
1. Xcode 실행
2. Single View Application
3. Project Name : “SimpleAni01”
4. storyboard에 Button과 Label 위치
5. Assistant Editor로 Label 드래그
6. “myLabel” 입력
7. Button을 Assistant Editor로 드래그 Connection을 Action으로 변경 “tapBtn” 입력
8. ViewController.m 파일에 입력
-(IBAction) tapBtn {
myLabel.center = CGPointMake(50, 100); //숫자는 좌표!
[UIView beginAnimations: nil context:nil];
[UIView setAnimationDuration: 2];
myLabel.center = CGPointMake(160, 240); //숫자는 좌표!!
myLabel.transform = CGAffineTransformMakeRotation(270 * M_PI / 180);
[UIView commitAnimations];
}
9. 실행
- ViewController.m 소스코드
#import "ViewController.h"
@interface ViewController ()
@end
@implementation ViewController
@synthesize myLabel;
- (void)viewDidLoad
{
[super viewDidLoad];
// Do any additional setup after loading the view, typically from a nib.
}
- (void)viewDidUnload
{
[self setMyLabel:nil];
[super viewDidUnload];
// Release any retained subviews of the main view.
}
- (BOOL)shouldAutorotateToInterfaceOrientation:(UIInterfaceOrientation)interfaceOrientation
{
if ([[UIDevice currentDevice] userInterfaceIdiom] == UIUserInterfaceIdiomPhone) {
return (interfaceOrientation != UIInterfaceOrientationPortraitUpsideDown);
} else {
return YES;
}
}
- (IBAction)tapBtn:(id)sender {
myLabel.center = CGPointMake(100, 100);
[UIView beginAnimations: nil context:nil];
[UIView setAnimationDuration: 1];
myLabel.center = CGPointMake(200, 200);
myLabel.transform = CGAffineTransformMakeRotation(240 * M_PI / 180); [UIView commitAnimations];
}
@end
- 실행화면

'C/Objective C > ios' 카테고리의 다른 글
| 아이폰 DatePicker 만들기 예제 따라하기 (0) | 2012.07.18 |
|---|---|
| 아이폰 Timer를 이용한 Animation 만들기 예제 따라하기 (0) | 2012.07.18 |
| 아이폰 ImageVIew 만들기 예제 따라하기 (0) | 2012.07.15 |
| 아이폰 ActionSheet 만들기 예제 따라하기 (0) | 2012.07.15 |
| 아이폰 AlertView 만들기 예제 따라하기 (0) | 2012.07.15 |