- DB에 저장된 값을 원하는것만 List로 출력하는 간단한 예제이다.
- SimpleCursorAdapter를 이용해서 listview로 보여지게 된다.
-Java 소스
-실행 화면

- SimpleCursorAdapter를 이용해서 listview로 보여지게 된다.
-Java 소스
public class Ex10_SQLite2Activity extends Activity {
MyDBHelper mDBHelper;
/** Called when the activity is first created. */
@Override
public void onCreate(Bundle savedInstanceState) {
super.onCreate(savedInstanceState);
setContentView(R.layout.main);
mDBHelper = new MyDBHelper(this, "Today.db", null, 1);
SQLiteDatabase db = mDBHelper.getWritableDatabase(); //write 다할수있음
db.execSQL("INSERT INTO today VALUES(null, '점심시간', '2011/07/15', '12:00', '여친과 식사', '1')");
db.execSQL("INSERT INTO today VALUES(null, '저녁시간', '2011/07/16', '18:00', '여친과 식사', '2')");
db.execSQL("INSERT INTO today VALUES(null, '아침시간', '2011/07/17', '08:00', '여친과 식사', '3')");
Cursor cursor = db.rawQuery("SELECT _id,title, time, memo FROM today WHERE date = '2011/07/15'", null);
// SELECT 에 맞는건만 리스트로 출력
SimpleCursorAdapter adapter = new SimpleCursorAdapter(this,
R.layout.itemlayout,
cursor,
new String[] {"title","time","memo"},
new int[] {R.id.text1,R.id.text2,R.id.text3});
ListView list = (ListView)this.findViewById(R.id.listview);
list.setAdapter(adapter);
mDBHelper.close();
}
}
-------------------------------------------------------------------------------------------------------
-------------------------------------------------------------------------------------------------------
public class MyDBHelper extends SQLiteOpenHelper {
public MyDBHelper(Context context, String name, CursorFactory factory,
int version) {
super(context, name, factory, version);
// TODO Auto-generated constructor stub
}
@Override
public void onCreate(SQLiteDatabase db) {
// TODO Auto-generated method stub
db.execSQL("CREATE TABLE today(_id INTEGER PRIMARY KEY AUTOINCREMENT, "
+ "title TEXT, " + "date TEXT , " + "time TEXT, "
+ "memo TEXT, " + "priority INTEGER);");
}
@Override
public void onUpgrade(SQLiteDatabase db, int oldVersion, int newVersion) {
// TODO Auto-generated method stub
db.execSQL("DROP TABLE");
onCreate(db);
}
}
- xml 소스
</LinearLayout>
- xml 소스
<?xml version="1.0" encoding="utf-8"?>
<LinearLayout xmlns:android="http://schemas.android.com/apk/res/android"
android:layout_width="fill_parent"
android:layout_height="fill_parent"
android:orientation="vertical" >
<TextView
android:layout_width="fill_parent"
android:layout_height="wrap_content"
android:gravity="center"
android:text="일정관리" />
<ListView
android:id="@+id/listview"
android:layout_width="fill_parent"
android:layout_height="fill_parent"
android:layout_weight="1" />
</LinearLayout>
-------------------------------------------------------------------------------------------------------<?xml version="1.0" encoding="utf-8"?> <!-- 리스트 안의 디자인 -->
<LinearLayout xmlns:android="http://schemas.android.com/apk/res/android"
android:layout_width="fill_parent"
android:layout_height="fill_parent"
android:orientation="vertical" >
<TextView
android:id="@+id/text1"
android:layout_width="fill_parent"
android:layout_height="wrap_content"
android:layout_weight="1" />
<TextView
android:id="@+id/text2"
android:layout_width="fill_parent"
android:layout_height="wrap_content"
android:layout_weight="1" />
<TextView
android:id="@+id/text3"
android:layout_width="fill_parent"
android:layout_height="wrap_content"
android:layout_weight="1" />
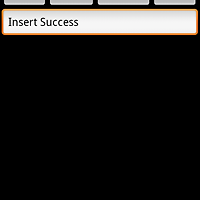
-실행 화면
'JAVA > Android' 카테고리의 다른 글
| 안드로이드 WebView 예제 따라하기 (0) | 2012.01.19 |
|---|---|
| 안드로이드 Calendar 예제 따라하기 (39) | 2012.01.18 |
| 안드롤이드 SQLiteOpenHelper 예제 따라하기 (0) | 2012.01.16 |
| 안드로이드 Preferences 예제 따라하기 (0) | 2012.01.13 |
| 안드로이드 FileIO(directory 저장 sdcard 저장) 예제 따라하기 (0) | 2012.01.12 |