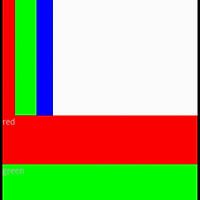
- 라디오 버튼을 그룹으로 묶어서 사용하는 라디오그룹 예제 소스이다.
- 라디오 버튼을 누르면 하단에 그림이 바뀌게 된다
- 채크박스 버튼으로 그림의 상태를 나타나거나 사라지게 할 수 있다.
-java 소스
public class Ex03_RadioGroupActivity extends Activity implements
OnCheckedChangeListener,
android.widget.CompoundButton.OnCheckedChangeListener {
/** Called when the activity is first created. */
@Override
public void onCreate(Bundle savedInstanceState) {
super.onCreate(savedInstanceState);
setContentView(R.layout.main);
RadioGroup rd = (RadioGroup) this.findViewById(R.id.radiogroup1);
rd.setOnCheckedChangeListener(this); // 라디오버튼을 눌렸을때의 반응
CheckBox cb = (CheckBox) this.findViewById(R.id.check);
cb.setOnCheckedChangeListener(this); //채크박스를 눌렸을때의 반응
}
public void onCheckedChanged(RadioGroup arg0, int arg1) { // 라디오버튼
// TODO Auto-generated method stub
ImageView iv = (ImageView) this.findViewById(R.id.image);
switch (arg1) {
case R.id.radio1:
iv.setImageResource(R.drawable.picture1);
break;
case R.id.radio2:
iv.setImageResource(R.drawable.picture2);
break;
case R.id.radio3:
iv.setImageResource(R.drawable.picture3);
break;
}
}
public void onCheckedChanged(CompoundButton arg0, boolean arg1) { //채크박스
// TODO Auto-generated method stub
ImageView iv = (ImageView) this.findViewById(R.id.image);
// Matrix matrix = new Matrix();
// matrix.postScale(100, 1, mid.x, mid.y);
// ImageView.setImageMatrix(matrix);
// ImageView.invalidate();
int maxHeight = 90, maxWidth = 90;
if (arg1) {
Toast.makeText(this, "확대를 선택하셨습니다.", Toast.LENGTH_SHORT).show();
iv.setAlpha(1000);
} else {
Toast.makeText(this, "축소를 선택하셨습니다.", Toast.LENGTH_SHORT).show();
iv.setAlpha(0);
}
}
}
-xml 소스
<?xml version="1.0" encoding="utf-8"?>
<LinearLayout xmlns:android="http://schemas.android.com/apk/res/android"
android:layout_width="fill_parent"
android:layout_height="fill_parent"
android:orientation="vertical" >
<TextView
android:layout_width="fill_parent"
android:layout_height="wrap_content" />
<RadioGroup
android:id="@+id/radiogroup1"
android:layout_width="wrap_content"
android:layout_height="wrap_content"
android:checkedButton="@+id/radio1" //라디오버튼에서 디폴트로 눌려지는 버튼
android:orientation="vertical" >
<RadioButton
android:id="@id/radio1"
android:layout_width="wrap_content"
android:layout_height="wrap_content"
android:text="그림 1" />
<RadioButton
android:id="@+id/radio2"
android:layout_width="wrap_content"
android:layout_height="wrap_content"
android:text="그림 2" />
<RadioButton
android:id="@+id/radio3"
android:layout_width="wrap_content"
android:layout_height="wrap_content"
android:text="그림 3" />
</RadioGroup>
<CheckBox
android:id="@+id/check"
android:layout_width="wrap_content"
android:layout_height="wrap_content"
android:text="확대시키기" />
<ImageView
android:id="@+id/image"
android:layout_width="wrap_content"
android:layout_height="wrap_content"
android:src="@drawable/picture1" />
</LinearLayout>
-실행 화면

'JAVA > Android' 카테고리의 다른 글
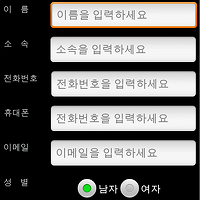
| 안드로이드 전화번호부 연락처 추가 만들기 예제 (3) | 2012.01.02 |
|---|---|
| 안드로이드 RelativeLayout 예제 따라하기 (0) | 2012.01.02 |
| 안드로이드 LinearLayout 예제 따라하기 (0) | 2011.12.26 |
| 안드로이드 ImageView 예제 따라하기 (0) | 2011.12.23 |
| 안드로이드 EditText 예제 따라하기 (0) | 2011.12.22 |