- 안드로이드에서 SharedPreferences 와 PreferenceScreen을 활용하여, 내부적인 저장을 해보자.
- 보통 어플리케이션 설정창을 이용할 때 많이 사용한다.
-Java 소스
public class Ex09_Preferences1Activity extends Activity implements
- 보통 어플리케이션 설정창을 이용할 때 많이 사용한다.
-Java 소스
public class Ex09_Preferences1Activity extends Activity implements
OnClickListener {
EditText text1;
EditText text2;
/** Called when the activity is first created. */
@Override
public void onCreate(Bundle savedInstanceState) {
super.onCreate(savedInstanceState);
setContentView(R.layout.main);
text1 = (EditText) this.findViewById(R.id.edittext1);
text2 = (EditText) this.findViewById(R.id.edittext2);
SharedPreferences pref = getSharedPreferences("PrefTest", 0);
String name = pref.getString("Name", "Guest");// name을 못읽었을때 guest
int no = pref.getInt("No", 0); // 저장하기위한 인자값받기
text1.setText(name);
text2.setText(no + "");
Button btn1 = (Button) findViewById(R.id.button1);
btn1.setOnClickListener(this);
}
@Override
protected void onPause() {
// TODO Auto-generated method stub
super.onPause();
SharedPreferences pref = getSharedPreferences("PrefTest", 0);
SharedPreferences.Editor edit = pref.edit();
edit.putString("Name", text1.getText().toString()); //저장된값가져오기
edit.putInt("No", Integer.parseInt(text2.getText().toString()));
edit.commit();
}
@Override
public void onClick(View arg0) {
// TODO Auto-generated method stub
Intent intent = new Intent(this, Setting.class); //PreferencesScreen 엑티비티
startActivity(intent);
}
}
--------------------------------------------------------------------------------------------------------
--------------------------------------------------------------------------------------------------------
public class Setting extends PreferenceActivity {
@Override
protected void onCreate(Bundle savedInstanceState) {
// TODO Auto-generated method stub
super.onCreate(savedInstanceState);
addPreferencesFromResource(R.layout.settings);
}
}
- xml 소스
<?xml version="1.0" encoding="utf-8"?>
<?xml version="1.0" encoding="utf-8"?>
<LinearLayout xmlns:android="http://schemas.android.com/apk/res/android"
android:layout_width="fill_parent"
android:layout_height="fill_parent"
android:orientation="vertical" >
<TextView
android:layout_width="fill_parent"
android:layout_height="wrap_content"
android:text="@string/hello" />
<EditText
android:id="@+id/edittext1"
android:layout_width="fill_parent"
android:layout_height="wrap_content" />
<EditText
android:id="@+id/edittext2"
android:layout_width="fill_parent"
android:layout_height="wrap_content" />
<Button
android:id="@+id/button1"
android:layout_width="fill_parent"
android:layout_height="wrap_content"
android:text="Edit Preferences" />
</LinearLayout>
--------------------------------------------------------------------------------------------------------
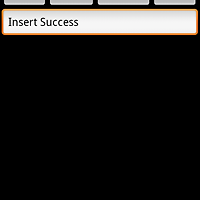
-실행 화면


--------------------------------------------------------------------------------------------------------
<?xml version="1.0" encoding="utf-8"?>
<PreferenceScreen xmlns:android="http://schemas.android.com/apk/res/android"
android:key="Pref_Screen" >
<EditTextPreference
android:defaultValue="0"
android:key="age"
android:summary="How old are you?"
android:title="Age" />
<CheckBoxPreference
android:defaultValue="true"
android:key="married"
android:title="Are you married?" />
</PreferenceScreen>
-실행 화면
'JAVA > Android' 카테고리의 다른 글
| 안드로이드 SQLiteOpenHelper 예제 따라하기 두번째 (1) | 2012.01.17 |
|---|---|
| 안드롤이드 SQLiteOpenHelper 예제 따라하기 (0) | 2012.01.16 |
| 안드로이드 FileIO(directory 저장 sdcard 저장) 예제 따라하기 (0) | 2012.01.12 |
| 안드로이드 CustormList 예제 따라하기 (0) | 2012.01.11 |
| 안드로이드 AdapterView(BaseAdapter) 예제 따라하기 (0) | 2012.01.10 |