- EditText에 글을 치고 추가하면 리스트가 추가되는 간단한 예제이다.
- 해당 리스트 뷰를 클릭하면 Intent로 값을 넘겨서 실행 시켜보자.
-Java 소스
public class Ex07_ListView1Activity extends Activity implements
OnItemClickListener, OnClickListener {
/** Called when the activity is first created. */
ArrayList<String> s;
ListView lv;
GridView grid;
ArrayAdapter<String> adapter;
@Override
public void onCreate(Bundle savedInstanceState) {
super.onCreate(savedInstanceState);
setContentView(R.layout.main);
s = new ArrayList<String>();
s.add("itemt0");
s.add("itemt1");
adapter = new ArrayAdapter<String>(this,
android.R.layout.simple_list_item_1, s);
lv = (ListView) this.findViewById(R.id.listview); //리스트뷰 뿌리기
lv.setAdapter(adapter);
lv.setOnItemClickListener(this);
grid = (GridView) this.findViewById(R.id.grid1); // 그리드뷰 뿌리기
grid.setAdapter(adapter);
grid.setOnItemClickListener(this);
Button bt = (Button) this.findViewById(R.id.button1);
bt.setOnClickListener(this);
}
public void onClick(View arg0) {
// TODO Auto-generated method stub
if (arg0.getId() == R.id.button1) {
EditText et = (EditText) this.findViewById(R.id.edittext1);
String s11 = et.getText().toString();
s.add(s11);
adapter.notifyDataSetChanged();
// lv.setAdapter(adapter);
}
}
@Override
public void onItemClick(AdapterView<?> arg0, View arg1, int arg2, long arg3) {
// TODO Auto-generated method stub
// Toast.makeText(this, s.get(arg2), Toast.LENGTH_LONG).show();
Intent intent = new Intent(this, MyPrint.class); // 해당 리스트를 눌렸을때 Intent넘기기
intent.putExtra("param1", s.get(arg2)); //s.get(arg2)가 눌렸을때의 번호
startActivity(intent);
}
}
-------------------------------------------------------------------------------------------------------
public class MyPrint extends Activity {
@Override
protected void onCreate(Bundle savedInstanceState) {
// TODO Auto-generated method stub
super.onCreate(savedInstanceState);
setContentView(R.layout.myprint);
Intent intent = getIntent();
String s = intent.getStringExtra("param1");
TextView text = (TextView)this.findViewById(R.id.text1print);
text.setText(s);
}
}
-xml 소스
//main.xml
<?xml version="1.0" encoding="utf-8"?>
<LinearLayout xmlns:android="http://schemas.android.com/apk/res/android"
android:layout_width="fill_parent"
android:layout_height="fill_parent"
android:orientation="vertical" >
<LinearLayout
android:layout_width="fill_parent"
android:layout_height="wrap_content"
android:orientation="horizontal" >
<EditText
android:id="@+id/edittext1"
android:layout_width="fill_parent"
android:layout_height="wrap_content"
android:layout_weight="1"
android:hint="추가하세요" />
<Button
android:id="@+id/button1"
android:layout_width="fill_parent"
android:layout_height="wrap_content"
android:layout_weight="3"
android:text="추가" />
</LinearLayout>
<LinearLayout
android:layout_width="fill_parent"
android:layout_height="fill_parent"
android:orientation="vertical" >
<ListView
android:id="@+id/listview"
android:layout_width="fill_parent"
android:layout_height="wrap_content" >
</ListView>
<GridView
android:id="@+id/grid1"
android:layout_width="fill_parent"
android:layout_height="wrap_content"
android:numColumns="auto_fit" >
</GridView>
</LinearLayout>
</LinearLayout>
-------------------------------------------------------------------------------------------------------
myprintln.xml
<?xml version="1.0" encoding="utf-8"?>
<LinearLayout
xmlns:android="http://schemas.android.com/apk/res/android"
android:orientation="vertical"
android:layout_width="fill_parent"
android:layout_height="fill_parent">
<TextView
android:id="@+id/text1print"
android:layout_width="wrap_content"
android:layout_height="fill_parent"
/>
</LinearLayout>
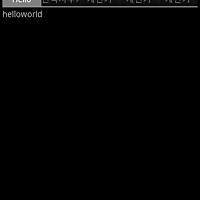
-실행화면


'JAVA > Android' 카테고리의 다른 글
| 안드로이드 AdapterView(BaseAdapter) 예제 따라하기 (0) | 2012.01.10 |
|---|---|
| 안드로이드 spinner 예제 따라하기 (0) | 2012.01.10 |
| 안드로이드 Intent putExtra, getIntent 예제 따라하기 (2) | 2012.01.06 |
| 안드로이드 Tabhost 예제 따라하기 (0) | 2012.01.05 |
| 안드로이드 TableLayout 예제 따라하기 (0) | 2012.01.04 |