- 아이폰의 Table View를 이용하면 많은 데이터를 한번에 보여줄 수 있게 된다.
- 안드로이드의 ListView와 동일한 기능이라고 생각하면 된다.
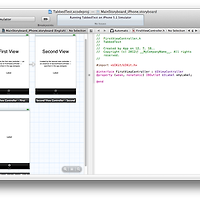
- 화면 디자인

- Table View 만들기 순서
1. Xcode 실행
2. Single View Application
3. Project Name : “TableViewTest2”
4. storyboard에 View Controller 삭제 – Navigation controller 위치
5. Navigation controller 오른쪽에 View Controller 위치
6. View Controller에 Label 위치 - “선택한 내용이 보이는 곳”
7. Root View Controller에 있는 Table View Cell 선택 – Command+Option+4
8. Identifier - “Cell”입력
9. Table View Cell에서 View Controller로 드래그 – Push 선택
10. ViewController.h 파일 편집
11. Root View Controller 선택 – Command+Option+3
12. Class에서 ViewController 선택
13. ViewController.h 파일 편집
14. ViewController.m 파일 편집
@interface ViewController: UITableViewControllr {
NSArray *myData1;
NSArray *myData2; }
@end
- (void)viewDidLoad
{ [super viewDidLoad];
myData1 = [NSArray arrayWithObjects:
@"롤 케이크",@"치즈 케이크",@"과일 케이크",nil];
myData2 = [NSArray arrayWithObjects: @"시루떡",@"백설기",nil];
}
- (NSInteger)numberOfSectionsInTableView:(UITableView *)tableView
{ return 2;
}
- (NSInteger)tableView:(UITableView *)tableView numberOfRowsInSection:(NSInteger)section
{
if (section == 0) {
return myData1.count;
} else {
return myData2.count;
} }
- (NSString *)tableView:(UITableView *)tableView titleForHeaderInSection:(NSInteger)section {
if (section == 0) { return @"양과자";
} else {
return @"한과자";
} }
- (UITableViewCell *)tableView:(UITableView *)tableView cellForRowAtIndexPath:(NSIndexPath *)indexPath
{
static NSString *CellIdentifier = @"Cell";
UITableViewCell *cell = [tableView dequeueReusableCellWithIdentifier:CellIdentifier]; if (cell == nil) {
cell = [[UITableViewCell alloc] initWithStyle:UITableViewCellStyleDefault reuseIdentifier:CellIdentifier];
}
// Configure the cell.
if (indexPath.section == 0) {
cell.textLabel.text = [myData1 objectAtIndex:indexPath.row]; } else {
cell.textLabel.text = [myData2 objectAtIndex:indexPath.row]; }
return cell; }
15. 실행
- ViewController.m 소스코드
#import "ViewController.h"
@interface ViewController ()
@end
@implementation ViewController
- (void)viewDidLoad
{
[super viewDidLoad];
// Do any additional setup after loading the view, typically from a nib.
myData1 = [NSArray arrayWithObjects:
@"롤 케이크",@"치즈 케이크",@"과일 케이크",nil];
myData2 = [NSArray arrayWithObjects: @"시루떡",@"백설기",nil];
}
- (void)viewDidUnload
{
[super viewDidUnload];
// Release any retained subviews of the main view.
}
- (BOOL)shouldAutorotateToInterfaceOrientation:(UIInterfaceOrientation)interfaceOrientation
{
if ([[UIDevice currentDevice] userInterfaceIdiom] == UIUserInterfaceIdiomPhone) {
return (interfaceOrientation != UIInterfaceOrientationPortraitUpsideDown);
} else {
return YES;
}
}
- (NSInteger)numberOfSectionsInTableView:(UITableView *)tableView
{
return 2;
}
- (NSInteger)tableView:(UITableView *)tableView numberOfRowsInSection:(NSInteger)section
{
if (section == 0) {
return myData1.count;
} else {
return myData2.count;
} }
- (NSString *)tableView:(UITableView *)tableView titleForHeaderInSection:(NSInteger)section {
if (section == 0) { return @"양과자";
} else {
return @"한과자";
} }
- (UITableViewCell *)tableView:(UITableView *)tableView cellForRowAtIndexPath:(NSIndexPath *)indexPath
{
static NSString *CellIdentifier = @"Cell";
UITableViewCell *cell = [tableView dequeueReusableCellWithIdentifier:CellIdentifier]; if (cell == nil) {
cell = [[UITableViewCell alloc] initWithStyle:UITableViewCellStyleDefault reuseIdentifier:CellIdentifier];
}
// Configure the cell.
if (indexPath.section == 0) {
cell.textLabel.text = [myData1 objectAtIndex:indexPath.row]; } else {
cell.textLabel.text = [myData2 objectAtIndex:indexPath.row]; }
return cell; }
@end
- 실행화면


'C/Objective C > ios' 카테고리의 다른 글
| 아이폰 Custom Storyboard Segue 예제 따라하기 (0) | 2012.07.22 |
|---|---|
| 아이폰 Tab Bar Controller 만들기 예제 따라하기 (0) | 2012.07.22 |
| 아이폰 Navigation Controller 만들기 예제 따라하기 (0) | 2012.07.22 |
| 아이폰 NSUserDefaults 예제 따라하기 (0) | 2012.07.22 |
| 아이폰 NSXMLParser 예제 따라하기 (1) | 2012.07.22 |